Script Modules - Web Views
Script Modules - Web Views
Web Views
Web views are using the QWebEngine functionality to render HTML5. Script Modules use web views to create custom interfaces in PT. It can include html, css, images, and js files. See Custom Interface tab in Scripting Interface in a previous section.
Each Script Module has a Web View Manager, which allows multiple web views. Each web view is owned by only one Script Module; no two Script Modules can own a web view at the same time. Web views can access IPC calls the same way as in the Script Engine, with the exception that events and delegates are not supported in web views.
Script Engine and Web View Communication
The Script Engine has access to the Script Module's webViewManager. Using this object, one can use the built-in web views in PT or create new web views that open up as seperate windows.
| In Script Engine |
|---|
// create a new web view with width and height and assign it to a variable
var newWebView = webViewManager.createWebView("window title", "http://www.cisco.com", 600, 400);
newWebView.show();
...
// change url
newWebView.setUrl("http://www.netacad.com");
|
Other calls to manipulate the web view are also available, such as change title, size, window flags and modality.
The Script Engine can also ask a web view to evaluate a JavaScript statement.
| In Script Engine |
|---|
newWebView.evaluateJavaScriptAsync("alert('hello')");
|
This method is the main way for the Script Engine to talk to web views -- ask the web view to evaluate JavaScript statements to show some interface changes.
Web views can also communicate with the Script Engine, using the $se() built-in function.
| In Script Engine |
|---|
function doSomething(argInt, argStr, argBool)
{ ... }
|
| In Custom Interface |
|---|
<html>
...
<script>
function onClick()
{
    // call doSomething function in Script Engine with 3 arguments
    $se("doSomething", 1, "some string", true);
}
</script>
...
</html>
|
Another built-in evaluation function available is $seev(). It can be used to evaluate Javascript code as a string. Note, that it must be called using await because it is based on Javascript Promise. Please refer to the end of this page for more information related to using await with other, similar APIs in web views.
| In Script Engine |
|---|
function doSomething(argInt, argStr, argBool)
{ ... }
|
| In Custom Interface |
|---|
<html>
...
<script>
function onClick()
{
    // call doSomething function in Script Engine with 3 arguments
    await $seev("doSomething(1, 'some string', true");
}
</script>
...
</html>
|
Each web view has a webView variable that is the IPC object of itself (see FAQ). A web view can use that variable to change its own properties.
| In Custom Interface |
|---|
<html>
...
<script>
function onClick()
{
    webView.ipcCallArgsAsync("setUrl", ["http://www.cisco.com"]);
}
</script>
...
</html>
|
There might be cases when the custom interface asks the Script Engine to do a task, and upon completing the task or on event, the Script Engine calls back a function in the custom interface. Because there can be multiple web views owned by the Script Module, we need a way to identify the different web views. Each web view has a web view ID that it can pass to the Script Engine along with the name of a function call. The Script Engine can use this ID to look up and call the function in that web view.
| In Custom Interface |
|---|
<html>
...
<script>

webView.ipcCallAsync("getWebViewId", (webViewId) => {
    $se("doSomething", webViewId, callbackFunc);
});
...
function callbackFunc(argInt, argStr)
{ ... }


// Or providing a callback inline:


webView.ipcCallAsync("getWebViewId", (webViewId) => {
    $se("doSomething", webViewId, (...) => {
        ...
    });
});

</script>
...
</html>
|
| In Script Engine |
|---|
function doSomething(webViewId, callbackFunc)
{
    ...
    var webView = webViewManager.getWebView(webViewId);
    $wvca(webView, callbackFunc, 123, "hello");
}
|
A shortcut function $wvca() can be used as an alternative to web view's evaluateJavaScriptAsync().
Custom Interface URL Scheme
To point a web view to a custom interface in Script Modules, use this scheme: scriptModuleID:customInterfaceID. There are two predefined Script Module IDs:
It can also point to a custom interface in a different Script Module by using the other Script Module's ID: net.netacad.cisco.PcChat:chat.htm.
| In Script Engine |
|---|
webView.setUrl("this-sm:Interface0.htm");
...
webView.setUrl("net.netacad.cisco.PcChat:chat.htm");
|
This also works from links inside the web views.
| In Custom Interface |
|---|
<a href="this-sm:Interface0.htm">htm in this Script Module</a>
<a href="file-sm:Interface0.htm">htm in the File Script Module</a>
<a href="net.netacad.cisco.PcChat:chat.htm">htm in another Script Module</a>
|
If the target link is in the same Script Module, the ID can be omitted.
| In Custom Interface |
|---|
<a href="Interface0.htm">htm in this Script Module</a>
|
After pointing a web view to load a custom interface in another Script Module, this Script Module no longer owns the web view, and will not have access to the web view any more. This is to enforce the sandbox for each Script Module and to prevent hijacking of web views after the page goes to a different Script Module.
Images, css, and js files should be imported to the Script Module's Custom Interface using the Import button. Once resources are imported, the custom interface can load them using standard HTML tags. External resources may not be resolved if an absolute path is not supplied.
| In Custom Interface |
|---|
<html> ... <link type="text/css" href="jquery-ui-1.8.7.custom.css" rel="stylesheet" /> <script type="text/javascript" src="jquery-1.4.4.min.js"></script> <script type="text/javascript" src="jquery-ui-1.8.7.custom.min.js"></script> ... </html> |
PT Built-In Web Views
There are two built-in web views in PT at the current time, the activity file instructions window and the device dialog.
Activity File Instructions Window
The activity file instructions window always renders the instructions set for the activity file. So the user can use the same instructions tab in Activity Wizard to edit this. The File Script Module is the owner of this web view.
Device Dialog
Each device dialog has a new tab with a web view that has direct access to the device. It has a device variable built-in that is the device's IPC object. So, within this web view, the custom interface can do the following.
| In Custom Interface |
|---|
<html>
...
<script>
device.ipcCallSeqAsync( "getPort", ["FastEthernet"], "setIpSubnetMask", ["1.1.1.1", "255.0.0.0"] );
</script>
...
</html>
|
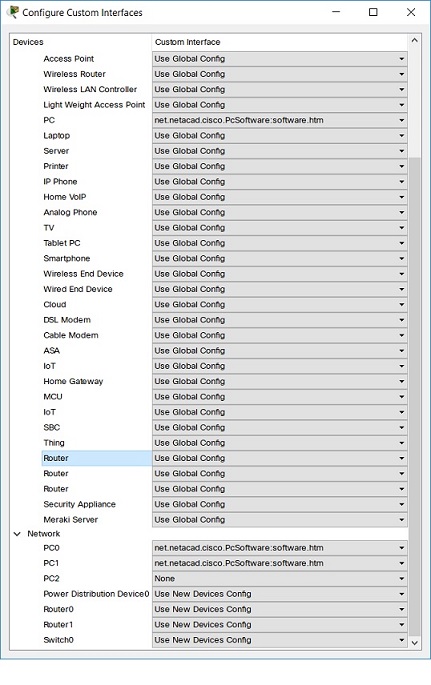
The default custom interface to render in each device's dialog can only be selected using the PT GUI. However, once a Script Module has ownership of the device dialog's web view, it can use setUrl() in the Script Module code to change the custom interface. The PT GUI allows changing the device dialog custom interface for this file only or for the PT globally. Go to Extensions->Scripting->Config File Custom Interface for this file, and Extensions->Scripting->Config Global Custom Interface or go to Custom Interfaces tab in Options->Preferences for the PT globally.

PT is packaged with a PcSoftware Script Module for the PC device dialog's Software/Services tab similar to the one in Cisco Aspire Game. It also comes with a separate Script Module for a new feature, PcChat, to be added to the main page of the PcSoftware Script Module. Because Script Modules work in a sandbox and cannot see or change anything about another Script Module, we send messages from PcChat to PcSoftware to register itself when it starts.
| In PcChat Script Module |
|---|
function main()
{
    ipc.ipcManager().sendMessageTo("net.netacad.cisco.PcSoftware", "ADD_SOFTWARE,Chat,net.netacad.cisco.PcChat:chat.htm");
}
|
Software in Script Modules developed by others can do the same and add themselves to the PC's Software/Services automatically.
Custom Interface IPC API Reference
As some code examples above demonstrate, PT run-time objects can be accessed and manipulated from custom interface code using IPC. This section provides a full list of the API calls that can be used for this purpose.
It is important to note that all API calls are asynchronous in nature and any results they may return must be processed by the custom interface code inside a suitable callback.
In the code below the following terms are used:
| object | refers to an IPC object being accessed. |
| callName | refers to a string name[s] of the IPC call[s]. |
| cb | a custom code callback function that will receive any results returned by the IPC call. |
| cbThis | an object that will can be accessed via 'this' inside the callback code. |
| [args] | designates a context-appropriate array object containing an argument list for the call at hand. |
| IPC Object API |
object.ipcCallAsync( callName, cb )
Examples:
    device.ipcCallAsync( "getName", (deviceName) => {...} )
|
object.ipcCallArgsAsync( callName, [args], cb )
Examples:
currentDir.ipcCallArgsAsync( "addTextFile", [fileName, fileContent, false], (b_added) => {...} )
|
object.ipcCallSeqAsync( callName1, [args1], ... , callNameN, [argsN], cb ) [1]
object.ipcCallSeqAsync( "callName1. ... .callNameN", [argsN], cb )         [2]
Examples:
    device.ipcCallSeqAsync('getProcess', ['FileManager'], 'getFileSystem', ['c:'], (fs) => {...} ) [1]
    device.ipcCallSeqAsync('getProcess', ['FileManager'], 'getFileSystem', ['c:'], (fs) => {...} ) [1]
    usbPort.ipcCallSeqAsync('getController', 'setSerialMonitoring', [true])                        [2]
    ipc.ipcCallSeqAsync("appWindow.setClipboardText",[text])

[args] for each call are optional and may be omitted, as per the call specification.
Here's an example:
    usbPort.ipcCallSeqAsync('getController', 'setSerialMonitoring', [true]);
|
| IpcCallAsync API |
IpcCallAsync( object, callName1, [args1], ... , callNameN, [argsN] )
A class enabling this high level API. Arguments following 'object' are like those for ipcCallSeqAsync.
Example:
    new IpcCallAsync(ipc, 'network.getDeviceAt', [0], 'setName', ['Router 1']);
|
IpcCallAsync.withResult( cb, cbThis )Allows to run a callback with the result of the encapsulated asynchronous IPC call. Callback receives a result of the IPC calls as its first parameter.
Examples:
    var call = new IpcCallAsync(ipc, 'network.getDeviceAt', [0], 'setName', ['Router 1']);
    call.withResult(cb, cbThis);

    var call = new IpcCallAsync(ipc, 'network.getDeviceAt', [0]);
    call.withResult(cb, cbThis); // cb is called with a device IPC object as its first parameter.
|
IpcCallAsync.withResult( cb, cbThis )Allows to run a callback with on the combined results of multiple independent(!) IPC calls. Callback receives an object with the same fields as input, but the values of these fields are the results of their respective IPC calls executed. Input structure can use any number of IpcCallAsync instances as long as they are independent from one another. The order in which such calls are executed is undefined.
Examples:
    IpcCallAsync.withAllResults( {
        aWin:     new IpcCallAsync(ipc, 'appWindow'),
        lw:       new IpcCallAsync(ipc, 'appWindow.getActiveWorkspace.getLogicalWorkspace'),
        devCount: new IpcCallAsync(ipc, 'network.getDeviceCount')
    }, function( r ) {
        // r.aWin		 - is IPC object for application window
        // r.devCount  - is the count of all devices in the network
        // r.lw 		 - is the logical workspace IPC object
        r.lw.ipcCallAsync('getCanvasNoteIds', function(itemIDs){
            for(var ind = 0; ind < itemIDs.length; ++ind){ // process array of itemIDs
              ... ;
            }
        }, this);
    });
|
| Synchronous Style API Using await |
await object.method1(arg1,...,argN).method2(...). ... .methodN(...);This is based on Javascript Promise objects.
The last example from previous section can be re-written like so using this style:
Examples:
    let aWin = await ipc.appWindow();
    let lw = await  ipc.appWindow().getActiveWorkspace().getLogicalWorkspace();
    let devCount = await ipc.network().getDeviceCount();
    let itemIDs = await lw.getCanvasNoteIds();
    for(let ind = 0; ind < itemIDs.length; ++ind){ // process array of itemIDs
      ... ;
    }
Each call, in a chain like ipc.network().getDeviceCount(), is wrapped in a Promise object, and each such Promise is resolved only when all Promises for preceding items in the chain have been resolved. This method of IPC access allows to write code that is asynchronous in nature, yet looks synchronous at source code level. This coding style leads to code that is easier to reason about, as it looks virtually indistinguishable from normal (synchronous) Javascript code.
The main drawback of this coding style, when compared to the methods described in previous sections, is comparatively poor performance in web views heavy on IPC access.
|
await $seev(program); |
await $putData(key, data); await $removeData(key); await $getData(key); |
[await] dprint(arg); |
Run-time Availability of The API
It is worth noting that API functions $seev, $putData, $getData, $removeData, and dprint are not available to code run inside body.onload event callback. This limitation may be removed in future releases. At the moment, however, one must take it into account when writing Javascript code for a WebView.
Example:
<html contenteditable="true">
<!-- One way of running page initialization code,-->
<!-- when the above-described API is available at run-time.-->
<head>
    <meta http-equiv="Content-Type" content="text/html; charset=utf-8">
    <script>

        // The above API will be available inside this function.

        async function on_web_view_api_ready()
        {
        	dprint("DATA_ITEM: " + (await $getData('DATA_ITEM')));
        }

        // This is 'body.onload' callback that waits until the above API is available.
        // After that it calls the above.

        function on_load_callback()
        {
        	let timer;
        	timer = setInterval(async function()
        	{
        		if(typeof window.$seev == 'function')
        		{
        			clearInterval(timer);
        			on_web_view_api_ready();
        		}
        	}, 100);
        }
    </script>
</head>

<body onload="on_load_callback();">
</body>

</html>